Servicing The Chevy Volt

Jan. 2, 2015
The Chevy Volt is an extended range vehicle that is similar to a hybrid vehicle since it also uses an internal combustion engine (ICE). Although the Volt’s ICE is not used in the same way as a conventional hybrid’s ICE, but rather uses the ICE as a generator to charge the HV battery. 

The Chevy Volt is an extended range vehicle that is similar to a hybrid vehicle since it also uses an internal combustion engine (ICE). Although the Volt’s ICE is not used in the same way as a conventional hybrid’s ICE, but rather uses the ICE as a generator to charge the HV battery. The Chevy Volt first model year was a 2011 model that was not properly portrayed to the motoring public. There were many that thought that the Volt was a fully electric vehicle that would run out of electricity and leave them stranded.

The fact is that the Volt is a vehicle that can be charged up and driven on pure electricity up to 51 or so miles without using a drop of fuel. As a Volt owner, my first (a 2011 model) as well as my 2013 vehicle have provided 51 miles on pure electric after one full charge, depending on the outside temperature and road condition. My average fuel mileage for both vehicles has been about 127 mpg while driving the vehicles normally on roads in New York and along the East Coast. There are others that live in a friendlier climate that excludes cold weather and snow and having way better mpg results. My friend Scott Brown is one such person, living in sunny California. Scott, who owns a 2013 Chevy Volt, has achieved 276 mpg (Figure 1) as his lifetime average.

Take a look at the data from his Volt app that displays a total of 38,124 total electric (EV) miles out of the vehicle’s total miles of 43,868. Scott drives from his home to work which is about 50 miles away. When he arrives at work he plugs his Volt in a local parking garage where is able to fully recharge his Volt and drive back home on full electric power. Now not everyone is Scott, there are many Volt owners that run out of electricity and have to use the Volt’s gas engine. If a Volt owner needs or wants to drive further than the expected EV projected miles they can do so because the vehicle’s ICE will kick in and take over, recharging the HV (high voltage) battery as it moves the vehicle.

Service Opportunities In order to recommend service to a Volt owner, you will need to be familiar with the vehicle along with understanding the dash and the center stack display (screen that is located in the middle of the dash, Figure 2) screen. Starting with the dash (Figure 3), there are many of the same symbols that you are already use to such as engine oil, engine coolant temperature, charging system (12-Volt), ABS, gas gauge, low fuel warning, speedometer, PRNDL, odometer, electric parking brake, TPMS warning, MIL, compass, door/ hood open, forward collision alert, lane departure warning, stabilitrak, seat belt, airbag, traction control, turn (directional) signal, high beams, cruise control and security. These are the ones that you may not be familiar with: HV battery gauge stack located under the fuel gauge (left side), total vehicle
range (left side under HV battery stack), driver information center (lower middle under average miles).

There is a dash selector nob located to the left of the steering wheel that allows the driver to select information such as trip A, B, messages, vehicle tutorial, etc.), driver efficiency gauge (round ball/earth) that is green when you are driving efficiently and yellow when you’re not. Charge door open, charge cord connected, wait to refuel (this message displays when the fuel system is pressurized having you wait to refuel the vehicle by delaying the unlocking of the fuel door), ready to fuel (this message will display when the fuel system is depressurized and ready to refuel). There is a driving mode selector that is also indicated on the dash. The different modes are; Normal (the default drive mode that will use the vehicle’s battery power up first before switching to the ICE), Sport mode (used for responsive acceleration while reducing electric range), Mountain mode (used for climbing long or steep grades) and Hold mode (only available when the vehicle is being used on electric, this mode places the remaining battery charge into a reserve for the driver to use as desired). An example of when to use this mode is if the vehicle is going to be driven at high speed that will deplete the HV battery charge at a faster rate than lower speeds. If the hold mode is selected the vehicle’s HV battery power is held in reserve until the vehicle is being driven at lower speed where the HV battery power can be used more efficiently resulting in better mpg average.

Another thing that you should be aware of is when to use L (low) on the vehicle, the owner may not be aware that this range should be selected while driving down a hill or in heavy stop and go traffic if they want to use the vehicle the most efficient way possible, resulting in the best mpg.

A helpful thing to know is if the 12-volt AGM battery or key fob battery goes bad is how to move the gear selector to neutral. To start a Volt or place the transmission in neutral you will need to open the dash storage panel, which is located on the center top of the dash and remove the rubber mat. Take the key fob and press the silver button to extend the metal key and insert it in the key slot. Once the key is in the slot the transmission lever can be moved to the neutral position or if you want to start the vehicle just press the Power button. The key slot can also be used to program other key fobs by placing a recognized key fob in the cup holder. Once the recognized key is in the cup holder insert the key into the driver door lock and turn the key five times to the unlock position within 10 seconds. Next a message will be displayed in the Driver Information Center on the dash that displays Ready for Remove #? (the next number remote to be programmed for the vehicle). Press and hold the Power button until the Driver Information Center displays the new key fob is Ready.
Other oddities of the Volt that need to be noted are some of the messages that will appear in the center stack display such as a message that engine maintenance has to be performed. This message will appear often since the ICE tends to go unused for a long period of time! One of the concerns is that the fuel in the 9.3 gallon capacity tank will become stale. I experienced this myself the last time I had to refuel and saw this warning message appear (Figure 3) on the dash and center stack display. In the 13,000 miles that we’ve driven the Volt, we’ve only used about 70 gallons of premium fuel and most of that was used during cold weather.

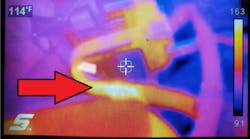
Because the fuel usage is so low, some Volt owners have a concern on what happens to the gas in the fuel tank. The GM engineers addressed this concern by installing a bladder style fuel tank that is pressurized in order to keep the fuel fresh. The Volt automatically will notify the driver by displaying the “Automatic Engine Maintenance” that will alert the operator if the engine has not been operated in 6 weeks. This function runs the engine to keep it properly maintained and lubricated. Automatic Fuel Maintenance (Figure 4) alerts the operator that the engine will run to use up some of the older gasoline in the tank if it’s one year old. If the fuel in the tank is over 365 days old, a message will also be displayed reminding the operator to add some fresh gas.

Volt Maintenance In this section we will cover the maintenance of the Volt from the basic checks, oil changes, tire rotation, to powering down the HV and more. On my current model Volt (13,000 miles driven), I‘ve performed two tire rotations, routine fluid checks, rear lens (both had to be replaced due to condensation inside them), one oil change that I performed only because the oil was in the engine just over a year (the oil life still had 50 percent or more left), and a computer software update to the latest Volt calibration. Scott, on the other hand, had the following maintenance performed in the 43,000 miles he’s owned his: one oil change, four tire rotations, one wheel alignment (due to a steering rack issue), right rear tail lamp assembly due to malformations of the lens, one software update for multiple modules, electronic parking brake, radio stack going blank and delayed departure mode software change that charges the HV battery.

Obviously before performing an oil change make sure that the vehicle is off (no Ready indicator) and properly set the lift at the lifting points on the vehicle to prevent damage. Unlike other hybrids, the battery on the Volt is located on the centerline and is T-shaped. Performing an oil change will require refilling the engine with 3.7 quarts of GM Dexos 5w30 approved oil. A word of caution here – there are oils that say they meet the specification but are not GM approved. You can find out for sure by checking with the GM website, www.gmdexos.com. Avoid damage to the oil pan by torqueing the drain plug to 14 Nm. As with every oil change service, you should check the levels for the windshield washer fluid, brake fluid, transmission/transaxle and all three cooling systems (engine, HV battery and HV electronics). The vehicle brake system uses the standard DOT 3 brake fluid that is checked and filled via the master cylinder reservoir.

The transmission needs to be checked with the vehicle off first followed by opening the hood so the ICE will run, followed by removing the transmission oil fill cap that is located on top of the transmission. GM recommends that the engine idles for at least five minutes to ensure that the dampener/converter is full as well as making sure that the transmission fluid warms up to 104-140 °F (40-60 °C). It is also recommended to move the gear selector through the PRND at least two times then back to P before removing the transmission oil filler cap. With the engine running, remove the transmission fill cap that is located on the top of the transmission, next remove the oil setting plug (located next to the drive axle) until a slow drip is visible since there is no dip stick. If the fluid needs to be replaced, remove the drain plug that is located on the bottom of the transmission and fill the unit with 9.4 (8.9L) of Dexron VI.

The cooling system is actually three different systems (Figure 6). The engine coolant reservoir is located on the right side of the vehicle’s engine compartment. The cooling system reservoir for the HV battery is located on the radiator support to the left front of the engine dip stick. The HV power electronics reservoir is located on the radiator support to the right of the oil cap. All the cooling systems use Dex-Cool in a 50/50 mixture with the engine using a mixture with drinkable water, while the HV battery and power electronics need a 50/50 Dex-Cool mixture with deionized water only. The A/C system utilizes an HV compressor that uses GM Polyolester (POE) refrigerant oil to prevent compressor failure and or loss of HV isolation. The vehicle has a maintenance free AGM 12-volt battery that should only be charged with an AGM charger capable of providing a proper charge to prevent damaged to the battery (Editor’s note: see David Macholz’s AGM article in the November 2014 issue of Motor Age).

The brake system on a Volt is the run of the mill normal four-wheel disc brake system that is serviced with the same repair procedures as other vehicles. The only service that may need to be performed on the brakes will be removing rust build up from the rotors and lubricating the calipers since the pads will not wear out for a very long time. The scan data (Figure 7) on the vehicle is abundant than most other vehicles since it has many different data PIDS. There is even a second OBDII port, the normal one that is located on the left side and one on the right side of the vehicle. Both sides use pins 4 for ground and 16 for power but they use different pins for CAN. The main or normal left/driver side CAN uses the normal 6 and 14 pins while the right/passenger side uses pins 3 and 11 for CAN. The passenger side connector provides access to a HV energy management CAN bus and is also used for service programming of specific modules.
If you need to power down a Volt to perform any work on the HV voltage system or remove any component that involves removing a part that is located near a HV component, you will need to locate and remove the (Figure 8) manual disconnect lever. The manual disconnect lever is located in the center console under a white cloth like cover. Before working on HV system make sure to use Personal Protection Equipment (PPE) and remove the manual disconnect lever and cover the exposed high voltage opening with UL listed insulation tape rated at a minimum of 600 V. Wait 5 minutes before attempting any work on the HV system until the HV capacitors have discharged. Use service information and a MegOhm meter to check and make sure that the HV voltage is not present.When A Volt Won’t Start After A Fender Bender I had a friend of my call me with a problem he encountered on a 2013 Chevy Volt that was in a slight fender bender. Even though the air bags were not deployed since there was only minor damage, the vehicle would not start up. The dash displayed a message stating “NO POWER” which means that the ICE or electric will not move the vehicle even though the battery level was over half full. My friend John was using the MDI/GDI 2 and selected the scan tool’s Read
Vehicle Wide DTC and ID Information that provided no DTC information in any of the modules. He thought that there had to be a DTC somewhere since the vehicle was displaying a message on the dash so he checked each individual module only to come up with the same results, no DTCs. John called me asking for help that I was able to provide through networking with another friend who works for GM. My friend Chris explained to me that there are two latching DTCs that will not appear in the DTC select of the scan tool but rather in the Special Functions section. Once you’re in the Special Functions of the scan tool go into the HPCM (Hybrid Powertrain Control Module) and HPCM2 (Hybrid Powertrain Control Module 2) and Clear Secured Trouble codes in both modules followed by cycling the ignition, then press the Power button to start the vehicle.

I hope this article provided you with a better understanding of the Chevy Volt and what to expect when you have to perform service on this vehicle. One last thing, take a look at my last 30 days mpg average (Figure 9), it’s a great vehicle to drive and own! 

Sponsored Recommendations

Snap-on Training: ADAS Level 2 - Component Testing

The second video for Snap-on's comprehensive overview of Advanced Driver Assistance Systems (ADAS), covering the fundamental concepts and functionalities essential for automotive...

Snap-on Training: Intro to ADAS

Snap-on's training video provides a comprehensive overview of Advanced Driver Assistance Systems (ADAS), covering the fundamental concepts and functionalities essential for automotive...

Snap-on Training: Guided Component Tests Level 2

The second video for Snap-on's comprehensive overview of Guided Component Tests, covering the fundamental concepts essential for diagnostic procedures.

Snap-on Training: Data Bus Testing and Diagnosis Part 1

Learn the basics of vehicle data buses and their diagnosis with Snap-on's Jason Gabrenas.

Voice Your Opinion!

To join the conversation, and become an exclusive member of Vehicle Service Pros, create an account today!