Diagnosing any vehicle’s problems without properly testing and evaluating the system is not a responsible repair technique and pretty much is asking for trouble. But realistically, understanding common problems and the tips and techniques to verify the cause and fix it quickly and correctly really does save time and money for everyone involved. So it’s smart to have a few diagnostic tricks up your sleeve.
From experience, certain heating, cooling and A/C problems tend to be caused by the same things and can be verified and repaired by understanding what they are and checking them right at the beginning of diagnosis. Plus, customers now tend to look up their vehicle’s symptoms on the Internet before they come in for service, and might have a strong idea of how the problem should be fixed. You need to be ready to handle those suggestions and explain why Internet advice might not apply to the type of vehicle or concern the customer has.
That said, there’s no substitute for proper diagnostic technique (developing a theory about what’s wrong and then performing tests and taking measurements to support or discredit that theory until the root cause of the problem is found), understanding common problems and solutions just reduces the number of things to test to save time and money, rather than replacing the diagnostic procedure completely.
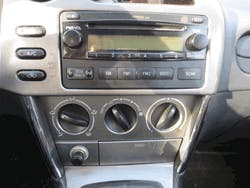
And of course, unless you’re the luckiest person in the world (and even if you are), it’s always a good idea to begin any diagnosis by visually inspecting the vehicle for obvious problems and checking for TSBs, programming updates and trouble codes and, of course, by pulling out the service information to be sure you understand how the system is supposed to work before you get started. One (excellent) service advisor I work with makes a point of asking the customer if they’ve left their system in “AUTO” mode when they bring in a vehicle with heating or cooling concerns to address the possibility that the customer just doesn’t understand how their vehicle works and prevent the technician from chasing problems that don’t exist.
HVAC Airflow Problems
Problem: Fan Inoperative (Common Cause: Blown fuse, likely because of motor problem such as binding or stiffness): Typically when diagnosing a complaint of no heat or A/C it’s a good idea to check that the problem simply isn’t that the blower motor doesn’t work – especially if the complaint is that the heat or A/C stopped working suddenly. Again, from experience, blower motors tend to fail suddenly rather than stop working slowly over time.
Typically, blower motor diagnosis involves inspecting the fuse, inspecting for power and ground at the motor (be sure to do that dynamically, using voltage drop) and checking for motor operation (either by supplying power or by removing the motor to see if it turns by hand). Even if the motor does suddenly operate when power is applied, it’s still a good idea to spin the motor by hand to check for any binding issues.
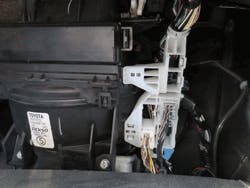
Blower motors often are located in areas that allow water, debris or other material to get inside them and cause them to fail. That also means they’re susceptible to creating problems with wiring, fuses and fuse blocks and connectors. In other words, if you discover a problem with the fuse or fuse block, it’s worth inspecting the motor itself to make sure it’s not the component causing all the trouble in the power supply system. If not, motor problems could cause the system to fail again a few days after the repair – not good at all.
Problem: Noisy Blower Motor (Common Cause: Debris in the Motor, or Faulty Motor): Noisy blower motors often can be caused by leaves or debris that get into the motor through the air intake cowling, and this can be verified by removing the blower motor and checking inside it for bits of debris (it doesn’t take much to cause a terrible noise and vibration). Cleaning out the foreign material and reinstalling the motor is often all it takes to fix the problem.
Noise problems can also be caused by the motor itself – especially if the motor is located in a spot that easily exposes it to the elements. In these cases the solution is to replace the motor and make sure the housing is free of dirt and debris or leaks that may cause repeat failure.
Problem: Blower Motor Inoperative on Certain Speeds (Common Cause: Problem in the Control Circuit): On older vehicles, a blower motor that worked only on high used to almost always mean problems with the blower resistor, and the solution typically was to replace the faulty blower resistor, which was usually a relatively cheap task. Additionally, the faulty resistor usually showed obvious signs of damage when it was removed (which was usually easy to do) so diagnosis was really simple and straightforward. If you wanted to check the resistor before removing it you could test that there was power and ground and that its resistance wasn’t 0 ohms – if it was there was a problem.
However, newer vehicles often use controllers rather than a resistor pack to vary the voltage sent to the motor to control the speed. But these control systems still go bad, frequently on certain types of vehicles. In these cases check for power supply and a good ground at the motor, and varying voltage when directed by the controller, to verify your suspicions.
Problem: Insufficient Air Flow from Air Vents, But Temperature is Correct (Common Cause: Clogged Cabin Air Filters): Newer vehicles often use cabin air filters and a clogged cabin filter can and does cause this low air flow problem.
Cabin filters use a very fine filtration filter, and they can get extremely dirty quite quickly and reduce the airflow into the vehicle to the point where it’s really noticeable. The solution is replacing the filter, and the proactive solution is checking for this on regular a basis, such as during routine maintenance inspections.
A/C Problems
Air Conditioning Inoperative (Common Cause: A Leak in the System): If a vehicle comes in with a complaint of no air conditioning at all, quickly check to see if the A/C compressor engages (it probably won’t). If it doesn’t, check to see if there’s actually any refrigerant in the system by attaching the gauges and noting the system’s resting pressure. If it’s empty or extremely low there’s likely a leak in the system that will need to be fixed before any further diagnosis can be done.
The most common leak sites are at the condenser (rocks or debris go through them or snow and salt collect and they rot out at the bottom), at the evaporator core, at the clamps where the lines are held against the body of the vehicle, and at the fittings and connections of the A/C lines so it’s smart to check those areas carefully. Joints, fittings and welds are usually the weak spots in the system where leaks occur. If the A/C system was completely empty hopefully the leak won’t be too hard to find.
A/C Not Cold Enough (Common Cause: Slow Refrigerant Leak or Problem with the Linkage): Usually this is caused by a low refrigerant level which is caused by a slow leak in the system, and the fix is to repair the leak and charge the system to the correct level.
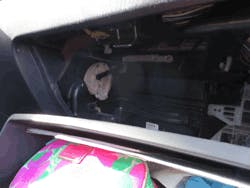
However, if the refrigerant level and system pressures are fine, the problem might be that the air mix door is binding (from foreign object falling into the path, often spilling out over the top of overfilled glove boxes or storage compartments) or its controller is malfunctioning (which will likely cause fault codes that indicate the problem). Depending on the age of the vehicle, diagnostic codes may not be retrievable with a conventional scanner and may need to be manually read from the HVAC system controls after initiating the proper processor. Always best to check the repair manual if you’re unsure.
If the pressure indicates that the system is fully charged and there’s still very little or no cold air from the A/C with the compressor engaged, there might be a blockage or restriction in the A/C system. If so, look for frost on the A/C lines under the hood. Depending on where the frost is this could indicate a blockage in the system, possibly from the expansion valve, receiver/dryer, or the condenser.
To evacuate the A/C system extra thoroughly to test this theory, run the A/C system for five minutes at about 1,000 rpm before evacuating it and then see how much refrigerant is recovered. If it’s undercharged, test for small leaks, repair as necessary, and recharge the system with the exact amount specified and recheck operation. If it’s overcharged, put the correct amount in the system and recheck. Some systems really are that sensitive and correcting the refrigerant level is all it takes to correct the problem.
Bad Smell From The A/C (Common Repair: Deodorize the Evaporator Core): A bad smell when the A/C is turned on usually comes from the evaporator core. There are excellent products that deodorize the components and eliminate the odor permanently, but in severe cases the fix is replacing the evaporator core (which can be extremely labor-intensive).
Prevent the problem from ever occurring in the first place by encouraging customers to run their air conditioning systems for half an hour each week during the winter (this helps defog the windows too) or operating the A/C system on road tests during regular maintenance.
Heating System Problems
No Heat (Common Cause: Air In The System, Low Coolant Level): One customer recently brought his vehicle in after his father-in-law replaced his coolant himself rather than pay for it to be done in a shop. He saved about a hundred dollars by letting him do it, and then came to visit us the next day when the low coolant level indicator came on and the vehicle had no heat. Unsurprisingly, there was air trapped in the system circulating through the heater core and affecting system operation. Purging out the air, filling the system properly and clearing the trouble codes fixed the problems.
Low or no heat conditions are often caused by low coolant level and if so, the customer also might notice a gurgling or sloshing sound from the dashboard, often more noticeable when the vehicle is steered hard in one direction or the other.
If the system is low on coolant, look for leaks as you usually would – carefully. It seems obvious but it’s worth mentioning that coolant is bad for you when it’s hot since it can cause nasty burns, but it can also be bad for you when it’s cold too since it’s quite poisonous – some of the older diesel techs I know avoid getting the long-life stuff on their skin and wash it off thoroughly when they do just to be safe. Limiting the time your skin is exposed to coolant and washing up thoroughly after you’re done is good practice, as is avoiding regularly inhaling the fumes and not letting it splash in your eyes or food. The material safety data sheets explain how to manage coolant responsibly so you don’t have health problems later on.
If you suspect problems with the head gasket, filling the system with coolant and snapping the throttle while the vehicle is idling in park might produce bubbles in the coolant reservoir that would support this theory. (This would be caused by combustion chamber pressure leaking into the coolant system bypassing the head gasket.) It’s important to note that using (distilled) water alone to top up the reservoir is not recommended since it can affect the coolant’s freezing point and life expectancy.
Coolant now comes in many colors (there’s no standard in the industry yet) and whatever color it is it should be clear and consistent, not murky, muddy or full of sediment (that indicates problems). Whatever type of coolant you use, it always needs to be handled carefully and disposed of properly. Even the environmentally friendly stuff should never be dumped out into the water or down the sewers.
Some antifreeze formulas are also affected by exposure to the air and must be stored in a sealed, clearly marked container and discarded within a week of being opened.
A clogged heater core could cause this problem, in which case engine could be at operating temperature but there’s still be no heat inside the vehicle. A quick check of the temperature gauge will show if the vehicle has warmed up or not and if you can safely access the heater core hoses they should be about the same temperature going into and out of the heater core.
This concern can be difficult to diagnose correctly at times because “too long to heat up” varies depending on ambient temperature and the type of vehicle involved. Some vehicles just won’t create enough heat to warm up the passenger compartment when it gets extremely cold outside (smaller engines are known for this).
Conclusion
If the problem isn’t caused by any of these common things, it’s smart to look for things like collision damage and any recent work that may have affected the system. Problems with the automatic climate control system can often be traced back to recent windshield replacement (sometimes sensors are left disconnected after the repair). Well-intentioned car washing can damage radiator and condenser fins and affect operation, especially if the protective paint coating has been removed and left the metal exposed to the elements.
Additionally, especially for electrical problems, quickly check for anything else that doesn’t work, especially if it shares a splice or connector with the problem circuit. You can often cut down on diagnosis time by focusing on that part of the circuit.
There’s no excuse for not properly diagnosing a vehicle but having a few diagnostic tricks up your sleeve and understanding the common causes of problems can reduce your diagnostic time and keep customers happy work profitable – and there’s nothing wrong with that.
