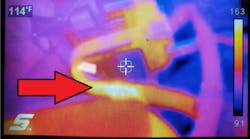
The vehicle exhibits shift feel and driveability complaints after the transmission has been overhauled or replaced. There have been several occasions where harsh shifts, shudder shifts and/or sliding shifts is due to a fluid to friction compatibility problem. If the adapts have been reset, power and ground health has been verified, valve body and solenoids are known to be good, the transmission fluid should be considered if the fluid being used is not O.E.
Of course resetting adaptations is critical on near all transmissions these days. Some can be performed with an aftermarket scan tool, others require factory equipment. In some cases manual methods are available by disconnecting the negative battery terminal and then run through specific drive cycles. This option has diminished dramatically and in most cases causes new issues the shop will need to contend with.
On some earlier Toyota and Lexus vehicles, when this option is provided, initializing other vehicle operations will be required before delivering the vehicle to the owner.
Here is O.E.’s manual reset procedure for some Toyota and Lexus vehicles:
1. Record radio station presets and #1 driver’s seat memory position.
2. Disconnect the negative battery cable for 5 minutes.
3. Reconnect battery cable and reset radio presets and #1 driver’s seat memory position.
4. Start the engine and warm it up to normal operating temperature.
5. Perform a thorough test drive with several accelerations from a stop with light throttle application until proper transmission shifting is verified.
NOTE: The following operations may need to be performed:
1. Initialize moon roof.
2. Initialize power windows
3. Calibrate compass.
Procedure for Initialization of Moon Roof:
1. Push and hold down the “TILT UP” side of the switch until moon roof tilts all the way up and then tilts down slightly, (approximately 10 mm at the rear).
2. Check for proper operation of the “One-touch slide open/close” and “One-touch tilt up/down” functions by pushing the switch briefly to the “SLIDE OPEN” and TILT UP” position.
Procedure for Initialization of Power Windows
1. Turn the ignition switch ON.
2. Open the driver’s window halfway by pressing the driver’s power window switch.
3. Pull the switch all the way up until the window is fully closed and continue to hold the switch for 3 seconds.
4. Release the switch and check that the “AUTO UP/DOWN” function operates normally.
Procedure for Rear Window Initialization (SUVs)
1. Turn the ignition switch ON.
2. Open the back door glass fully.
3. Press the back door power window switch until it is fully closed and continue to hold the switch for 1 second or more.
4. Check that the “AUTO UP/DOWN” function operates normally.
2. Push the “MODE SWITCH” for longer than 3 seconds until the zone number (1 to 15) appears on the display. Then push the switch to select the number of the zone where the vehicle is located, (See Figure 1).
3. Check that the direction N, NE, E, SE, S, SW, W, NW or C appears several seconds after adjustment.
4. Start the engine and push the switch for 6 seconds until “C” appears on the display.
5. Drive the vehicle at 5 mph, or less, in a circle until the direction is displayed. If there is not enough space to drive in a circle, drive around the block until the direction is displayed.
IMPORTANT NOTES:
1. Do NOT perform calibration of the compass in a place where the earth’s magnetic field is subject to interference by artificial magnetic fields such as underground parking, under steel structures, between buildings, etc.
2. During calibration, do not operate electrical systems such as moon roof, power windows, etc, as they may interfere with the calibration.


