Some readers will likely remember an RX7 I mentioned in a sideline a few years back that kept eating rear axle bearings. It started when the car was barely six weeks old. The car came to the dealership for noise in the rear end, and the rear bearings were a mess, so they were replaced and the RX7 left quietly. A few weeks later, the car was back with the same noise, and the bearings were destroyed again. After the third time, the field service engineer authorized the replacement of the entire rear axle. A month later, the car was back with the same problem, and so Mazda bought it back and sent it to one of their training centers, where the instructor found the problem purely by accident during an electrical class.
The battery-to-engine ground cable had never been tightened when the car was built, and so every time that rotary engine was cranked, the starter would find ground through the body by way of the park brake cables into the rear axle, where it arced on the bearings, then went at the speed of light up the driveshaft into the engine block to the starter housing, and the starter would spin. Enough arcs on those polished surfaces and they would give up metal and lose their luster in a big way. And after miles of driving, and nobody anywhere could look at the ruined bearings and figure out the origin of the ruination.
Problems like this one are the spice of a troubleshooter’s life, and usually after the repair is complete and the head scratching is done, we can draw ourselves a map from condition to cause to correction. Of course, we have to sort out the causes and the effects along the way, and that can require some mental gymnastics.
More recently, one of my students complained that after every time he gassed up his 2008 Kia Rondo he’d have to wait about ten minutes before the vehicle would start. That was a head scratcher too, and after a bit of thought and some research we found out that the canister purge valve was always open, and that all the vapor being shoved out of the empty space in the gas tank during refueling was being forced through the open purge valve into the intake. When he attempted to start the engine immediately afterward, that heavy hydrocarbon vapor, along with the double pulse from the injectors during engine crank, would dampen the spark plugs enough to cause the no-start condition until the plugs dried off enough on their own to begin firing again. Careful with his money, this guy wanted to know how to test the part before ordering a replacement, and I showed him how to verify that air (and hydrocarbon vapor) could pass freely through the old purge valve no matter whether it was energized or not.
Gathering data and sorting it out requires a sharp-minded clear thinker, and everybody who’s in the know will agree that a really good troubleshooter in our field needs to be just a bit smarter than the average bear on a number of levels. So let’s launch into a couple more stories as we travel the winding road to the B2300 brainteaser.
The F-150
With new vehicles costing as much or more than the house I built back in the mid-eighties, it’s a no-brainer that people are jumping through hoops to keep their older wheels rolling. I have no hard numbers on this, so shout me down if you disagree. Pickups tend to stay on the road longer than cars because cars don’t have the same “cool” factor and on the practical side, you can’t haul much in the back of a Buick Century or a Ford Taurus. A colleague of mine brought us his 1998 F-150 with an MIL illuminated, suddenly dismal fuel economy and a strange new noise.
A year ago we had repaired a P0401 code on this same truck after he had attempted to replace the EGR valve on his own and had broken one of the valve’s seized retaining bolts, so rather than drilling out the broken bolt, we had simply robbed the throttle body goose neck off another 98 F-150 engine we had just yanked out of a truck like his, cleaned the EGR passages, installed the new EGR valve he had purchased, and got the gasses flowing again. Well, now his P0401 was back along with fuel trim numbers hovering near +20 on bank 2 (bank 1 stayed near zero), and we also had what sounded like an mild exhaust leak somewhere on the passenger side of the engine.
Applying some vacuum to the EGR valve by grounding the EGR Vacuum Regulator trigger wire, we heard the idle quality deteriorate and saw the voltage at the DPFE change from 0.6 to something like 3.5. While the DPFE should have gone a volt higher with EGR flowing, I was satisfied that the hands-on test exonerated the vacuum feed, the EVR, the EGR passages, the DPFE sensor and the silicone hoses.
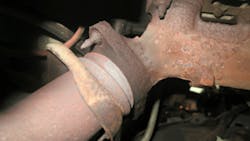
Well, the end of that story was that the exhaust noise was the cause of both the P0401 and the high bank 2 fuel trims. One of the exhaust manifold header pipe studs had melted away with age and the header pipe had dropped a bit creating enough of an exhaust leak to reduce EGR flow because of lower backpressure at that point (the tube gets its feed from about an inch north of there) and to allow the O2 on that bank to get a good sniff of fresh air that skewed the fuel trim.
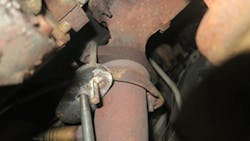
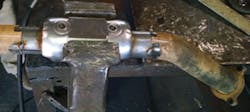
The owner needed the truck for the weekend, and it was the end of the day at the end of a week, so I grabbed an old 5/16 Allen wrench, some all thread, a 3/8 nut and the hourglass-shaped plug plate from a new A/C compressor and applied 10 minutes, the torch and a bit of brazing to build a temporary clamp with the agreement that we’d replace the quick-fix contraption I built by drilling out the dissolved bolt at a later date. That concludes story “related or not” No. 1. The sound, code and fuel trim were the condition, the exhaust leak turned out to be the cause, and fixing the exhaust leak turned out to be the correction. These three concerns were obviously related.
The old Blazer
This second story is about a pain-in-the-fanny brake problem ‘88 Blazer that belongs to one of my guys – yeah, I know it’s old, but this won’t take long. He had lousy brakes, a leaking master cylinder and a hissing booster, so he bought a rebuilt booster and master cylinder assembly from his favorite parts store chain. He removed the cylinder from the booster, replaced the booster, then bench bled the reman cylinder and installed it to discover he still had a lousy pedal. We bled the brakes until we were blue in the face and even adjusted the rear brake shoe clearance, but that didn’t do anything at all for the pedal height, which felt passable with no vacuum at the booster, but the pedal went to the floor with the engine started. Further, fluid would geyser from the larger rear chamber like Old Faithful with every brake pedal application if you pumped the pedal with the fill cover off. He got a replacement reman from the parts store and it did the same thing, but with a new problem — the brake line from the smaller (rear brake) chamber couldn’t be tightened enough not to seep fluid, and no amount of bleeding worked – that one performed just as poorly. Then we got a replacement master cylinder from a different parts store that looked and acted entirely different. The reservoir was even a different shape. With that one, we had good pedal and neither line seeped fluid. Condition – lousy brakes. Cause, lousy master cylinder – corrected!
The Envoy
This 2004 Envoy had a couple of unrelated problems, but it bears a short visit. The owner complained that the vehicle lacked power and that the seat belt on the passenger side didn’t work. The belt was hung up so that you couldn’t reel out any strap to buckle it, and that belt happened to be built into the seat, and the seat had to come out and be stripped nude to get to it. We ordered one from the GM dealer.
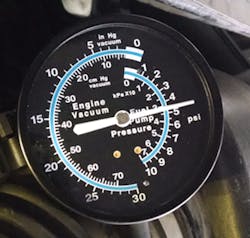
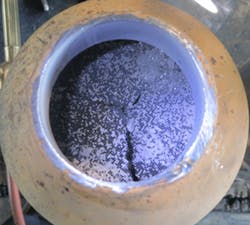
We did some basic checks on the low-power concern and wound up focusing on the catalyst. I have a Forward Looking Infrared (FLIR) camera, but I couldn’t categorically condemn the converter with the picture I took with it, so I had one of my guys remove the O2 sensor (which fought us tooth and nail to the point that we destroyed it getting it out of there) and then we screwed a homemade tool of mine in there. A year or so ago I had taken the 18mm plug out of a new catalytic converter’s O2 sensor hole, drilled it, tapped it and installed a brake bleeder for a hose connection. With the O2 removed and the hose of a plain old vacuum/pressure gauge installed, we read 5 psi of pressure upstream of the converter, ordered a Walker universal weld-in replacement, and the rest is history. The original catalyst was cracked and clogged to beat the band, and so that problem was solved. Condition – low power; cause, clogged cat; correction – no-brainer.
In the meantime, the seat belt assembly we had ordered from the dealer came in and when we got the seat stripped down and unpackaged the new seat belt we discovered two crucial facts.
1. The replacement seat belt wasn’t the right one. Not even close.
2. A popsicle stick that had fallen into the seat was fouling the reel.
Condition, cause, correction. Simple!
The B2300 epic
In regards to our focus vehicle, the maintenance man who owns the Mazda pickup in question told me that as he drove, his A/C airflow would gradually decrease to the point that, while he could hear the fan, he had no air at the register. I asked if the air was going north into the defrost vents, and he promised to investigate and report that piece of data the next time he drove. At our next liaison, he reported that there was no airflow anywhere when the registers died.
Let me pause here to say that he usually mentioned this concern in passing as he was making his rounds in the shop while I was preoccupied with other tasks, and without giving his concern too much thought I initially theorized that he had a problem with loose leaves in his evaporator case. We have that problem in these parts. Perhaps the leaves or trash would settle away from the evaporator when the truck was sitting fallow and then be picked up one or two at the time until the airflow was mostly blocked? That theory was really kind of weak, and I should have been thinking more clearly, but any time airflow goes away and the fan is still spinning, it’s a foregone that there’s something going on with the evaporator.
A week or so later he told me he was having to jump the little truck off in the mornings. He’s an industrial electrician (a good one) and he checked the battery voltage each time he had to jump the truck off; it was always in some state of discharge, usually below ten volts on his meter, and then one day I had him stop the truck long enough to have a look see at it myself. He parked the truck outside one of my service bays, and I dug my personal meter out of a desk drawer, set it on amps, and we connected it in series with one of the battery cables. I explained that we’d need to let it sit there with the meter connected for at least 30 minutes to let all the boxes charge up their capacitors and whatnot, and so we did.
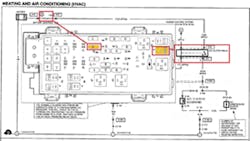
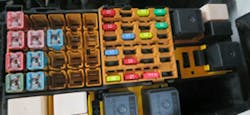
When the appointed time had expired, I walked to the truck and still found 2 + amps flowing. He was passing by on his security patrol on the golf cart and stopped by to compare notes just as I was getting started. I explained that we’d need to start at the under hood fuse panel, and so he reached and took the cover off – and for a second, the amperage deflected to a lower reading, then returned to just over 2 amps.
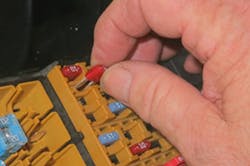
We started removing the larger fuses while watching the meter, and finally worked our way down to fuse 25, which feeds the secondary side of the A/C clutch relay, and we heard the telltale “click” of the compressor clutch disengaging. I reinstalled the fuse and heard the “click” as A/C clutch snapped back in, and then removed the clutch relay to see and hear the same disengagement. After that it was as simple as moving the washer pump relay to that relay position and verifying that the clutch worked right.
While we were thus engaged, I had one of my guys removing the blower so we could look in the evaporator case for trash, but now we fully understood why his airflow was going away. If the compressor relay coil is de-energized on this one, the compressor is supposed to drop out, but with the relay contacts welded together, the compressor just kept on refrigerating regardless of the PCM’s command until the evaporator became a block of ice.
After the fact, it was abundantly clear that his symptoms were related. We just didn’t know how until the smoke cleared and the ice melted. Conditions: airflow and parasitic drain. Cause: stuck relay contacts. Correction – obvious.

